

I turned 50 in June 2020 (June 23 to be exact) and I had an amazing trip to Greece and Romania all planned out.
So when the COVID pandemic put a cease and desist order on almost all travel (and most certainly travel of Americans to Europe)- I wanted to figure out some way to still celebrate my milestone birthday.
I figured- my husband still has the three weeks off that we were supposed to be gone on vacation so why not buy a saw and learn how to DIY board and batten together?
We have now put various styles of board and batten in both daughters’ rooms as well as my office loft space!
As an Amazon Influencer, I earn from qualifying purchases. Some of the other links on this site are also affiliate links, which means I might earn a small commission if you love something as much as I do at no additional cost to you… but I only recommend what I actually like myself!
Read the full disclosure here.
In a rush?

Steps for Board and Batten:

Plan, Plan, Plan and Then Plan Some More…
Without a doubt, the first step in doing board and batten on an orange peel (ie textured) wall- is planning planning planning and measuring measuring measuring…
You will need to make sure you put a batten (the thinner pieces of the millwork) over every seam of the boards.
We tried to use a wainscoting calculator that we found on Google but to be honest- it really did not take into consideration our seams and almost seemed to make it harder to plan out.
A lot of this project really is just plain trial and error fyi…
Purchase the Materials
These are the items we used for our project:
- A compound miter saw (chop saw)
- A jigsaw
- A multi-tool
- A handheld sander
- Self leveling laser
- Nail gun
- MDF boards (this is where your measuring comes into play so that you know how many mdf boards you need) – make sure you buy about 15% extra to allow for measuring errors and mess ups!
- Battens – we used 2.5 inch size for the battens and 5 inch for the top, sides, and bottom boards – buy extra of these as well because you will likely make some errors here too…
- Caulk
- A Caulk Gun
- Wood Putty
- Liquid Nails
- Paint
- Paint Brushes and rollers
- Rags
Our favorite products for DIY’ing board and batten
- Huepar Self leveling laser
- 3M Small Hole Repair/Wood putty
- Purdy mini roller
- Purdy 3/8 inch nap for mini roller
- Ryobi multi tool
Estimated reading time: 16 minutes
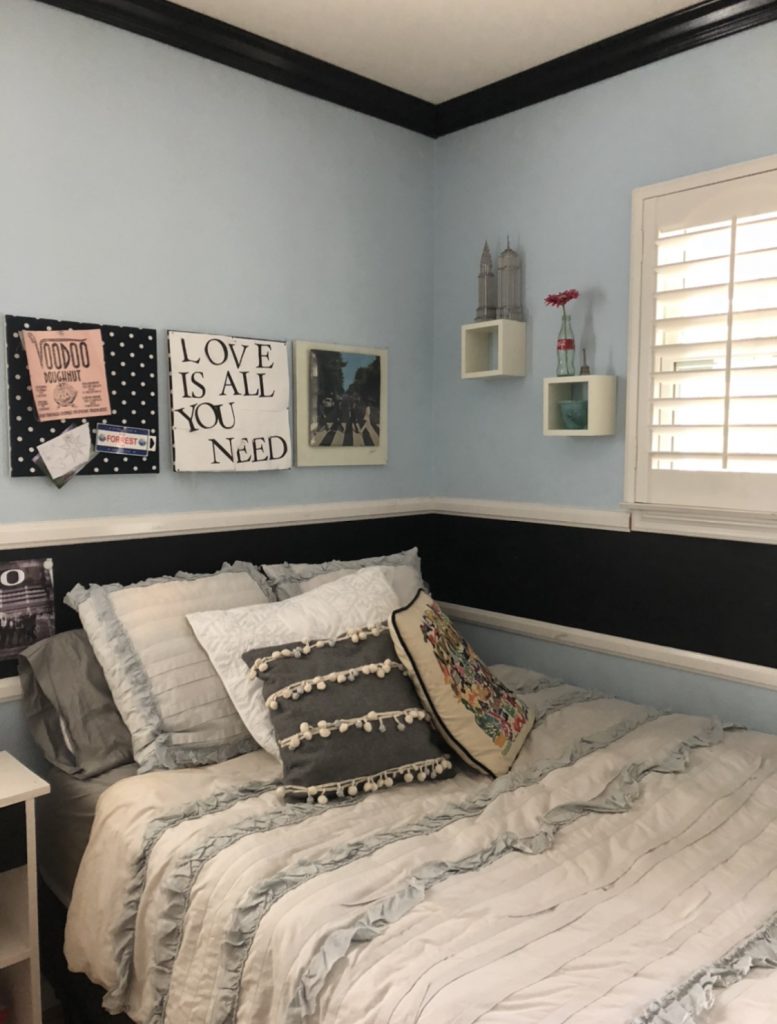
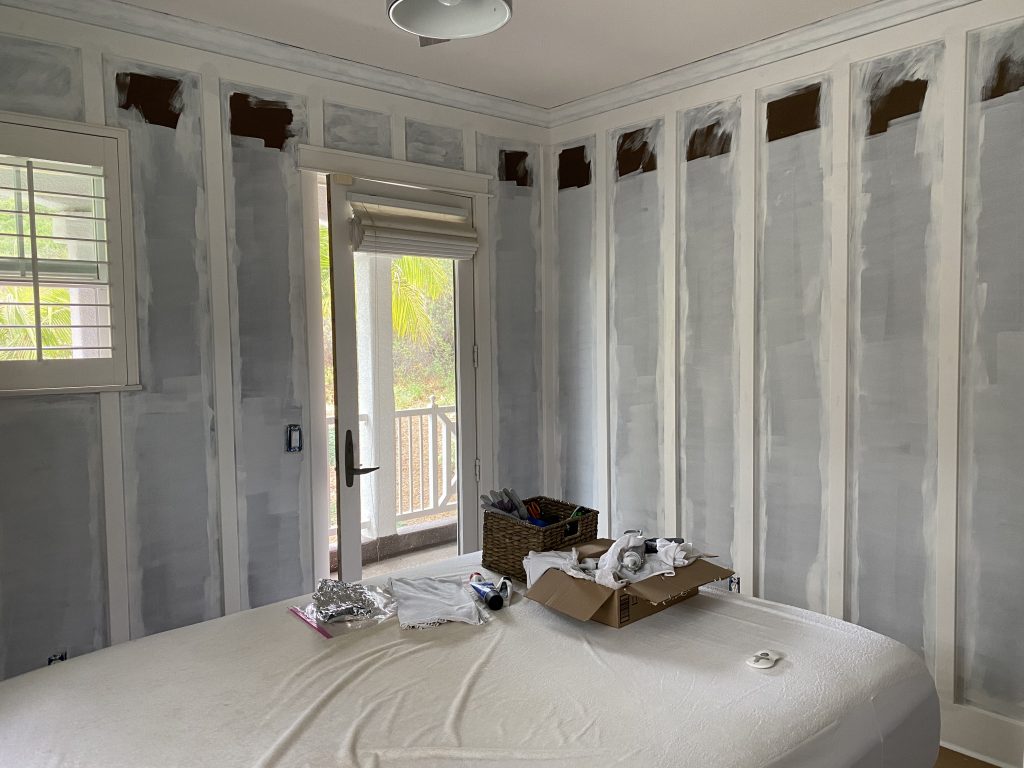
Before photo of my youngest daughter’s bedroom (the first room we DIY’ed board and batten in!):

Line Up Where the Seams Go
Our first step was to measure and cut the boards so that the top seam lined up with where we wanted a horizontal batten to go as well as making sure the vertical seams were in good positions for battens too…
We used poplar boards in this first room we did but then changed to MDF boards for our next projects.
You do not have to worry about perfect cuts for the tops of the boards and seams where the boards meet as the battens will hide all of your imperfections. The 2.5 inch wide battens give plenty of leeway for this!
Put the MDF Boards on the Walls
We used liquid glue and our nail gun to put the boards on the walls. It is super important to know exactly where you want all of the seams for your boards BEFORE you glue and nail them to the walls so make sure you think this part out before you start!!!

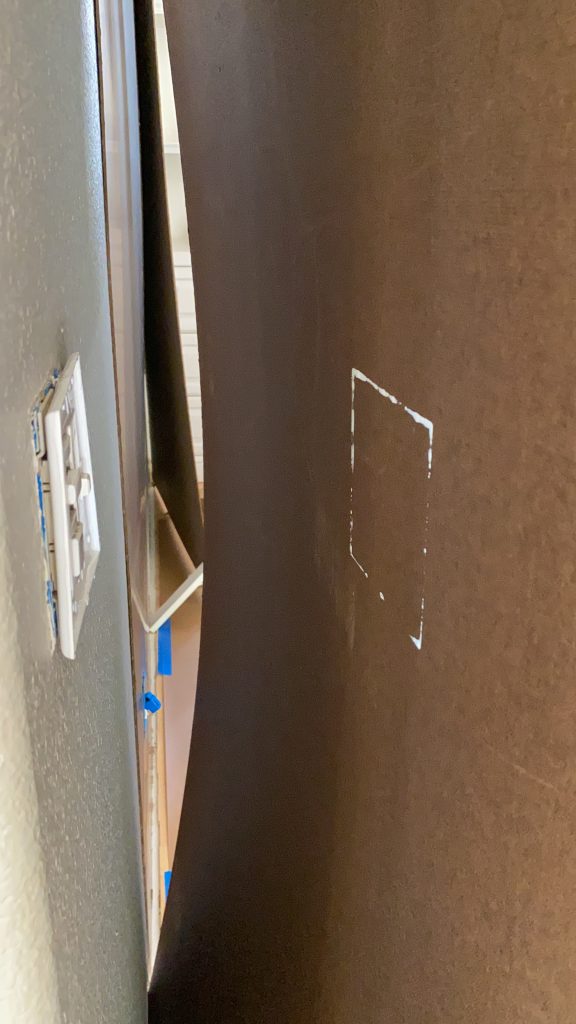
The BEST TRICK EVER for figuring out where to cut the hole for your outlets on your MDF boards
Put the cover on backwards with paint around the edges, smash the board up against this cover, and voila- you will have the exact location of where your electrical outlets should be!
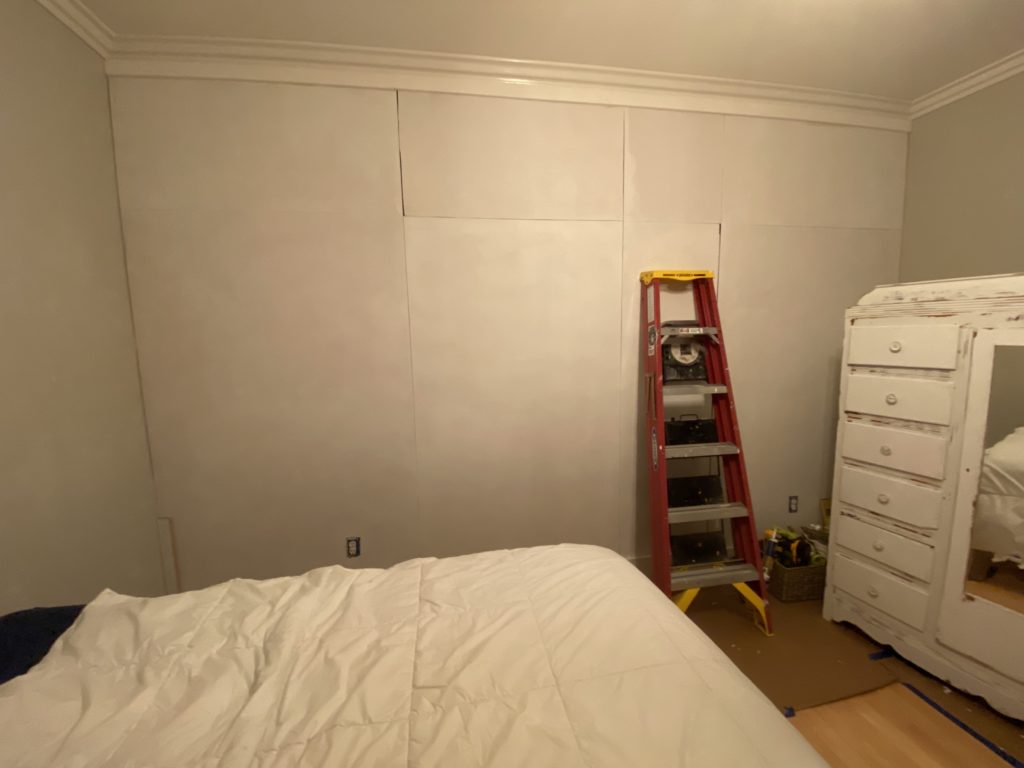
Prime the MDF Boards
I highly suggest priming the boards before you put up the pre-primed battens.
In my opinion- it is waaayyy easier to prime when it’s just the boards up on the wall vs if the battens were already up – as long as you are using pre primed battens that is (which I HIGHLY suggest!) 🤷♀️.
Trust me – I did it both ways and priming first is MUCH BETTER!!
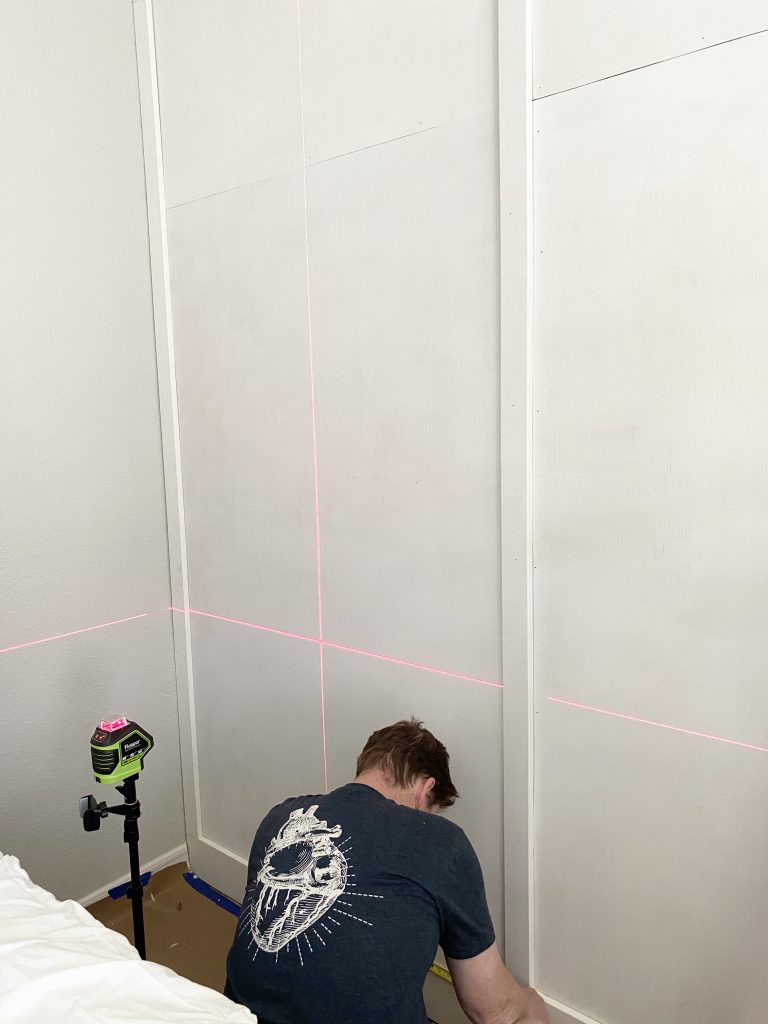
Put Up the Battens
Our next step was the battens! This is where we are so thankful we learned about the Huepar self leveling laser level. As my husband will attest to- this product was a huge time saver!
Your squares will not all be the EXACT same measurement fyi… might even be off by 1/2 an inch in some squares- but trust me- you will not notice!!
We laid out all of our vertical battens and did some decent measuring to make sure their measurements were as close as can be.
Then we used liquid nails and our new Ryobi nail gun (which I loved using btw!) and got all those battens up in a day!
This is the laser level at work – my husband says it is seriously the best tool you could use for this project! So do yourself a favor and GET ONE!
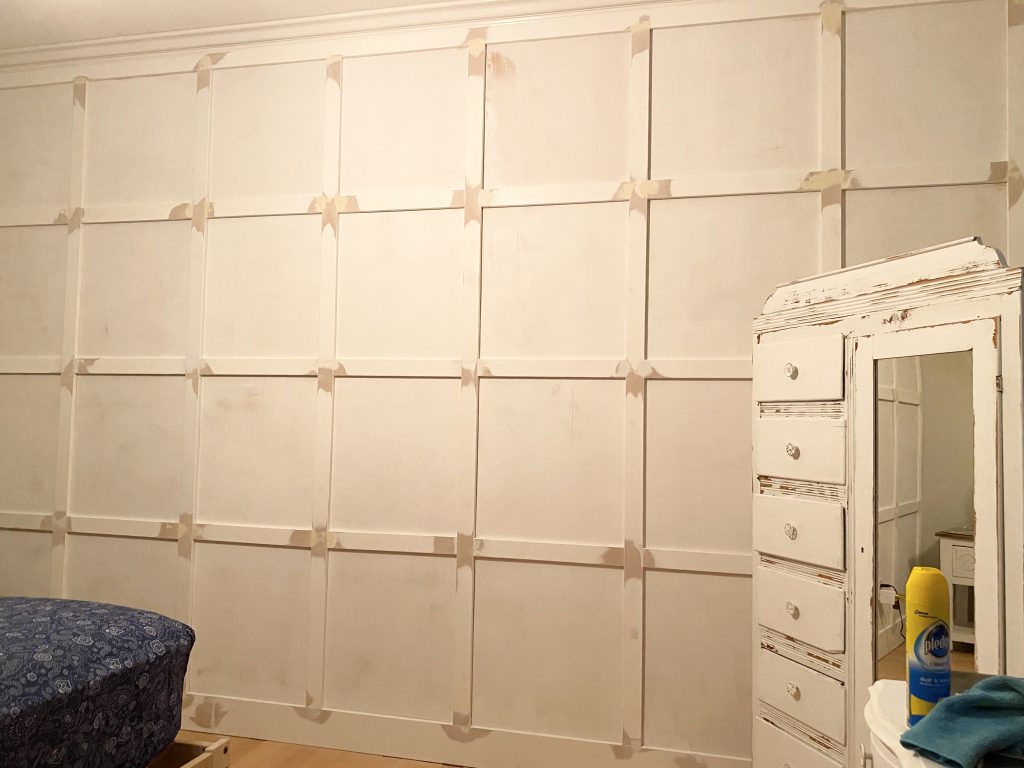
Sand, Putty, and Then Sand Again
Finishing items take quite a bit of patience and time 😬.
I spent an entire day sanding each of the meeting corners so that they were crazy smooth and no seams were visible.
Then I used wood putty on each seam and nail hole. Then I sanded again any corners that needed it one more time to really get that super smooth feel on the wood!!
This product is seriously one of my favorite parts of this project!! 100% suggest you use it for your project! Or any hole in any wall in your house you need to fix!
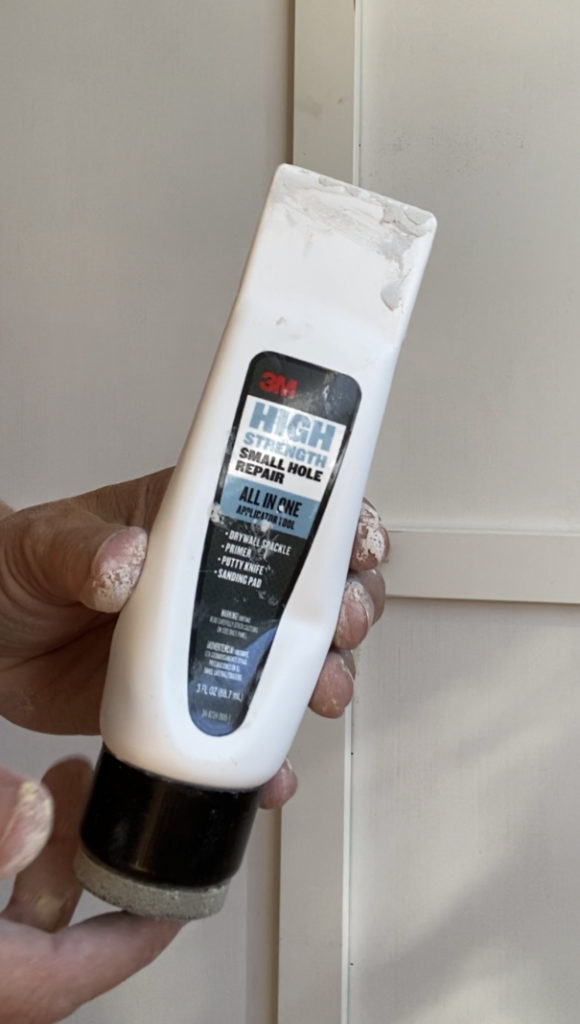
You have to give wood putty a day to dry so the next day, I went back and sanded down the extra wood putty on each seam.
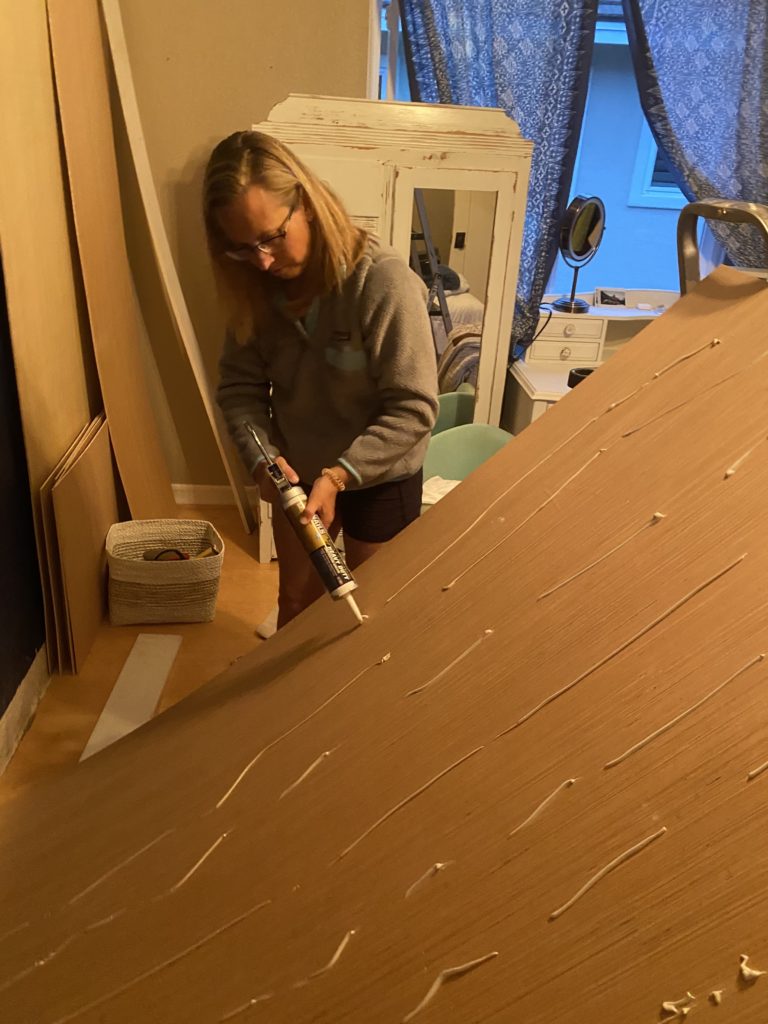
Caulk
Caulking is messy as all get out!
Being my first time caulking anything ever, I really had NO IDEA what to expect.
I know now- expect to make a disastrous mess and if you can- buy a 5 pound bag of t-shirt rags from Amazon like I did for the other two projects to make your life easier!!
I also think I really should have had gloves on the whole time I was using wood filler and caulk because my finger tips were pretty dang raw by the time I was done with this wall :0.

There are a TON of videos on how to caulk out there if you google it and tbh I was petrified of doing it my first time but once I got going I was like okay this is sooo not scary at all and the caulking gun is actually rather fun to use!
The keep your finger wet trick is quite helpful and I also must have used at least ten rags per job because I wiped my fingers clean after every single time I smoothed the caulk line.
Paint the Entire Project
Once the caulking was done, I gave it a day to dry and went back the next day to paint the whole wall. This was also quite time consuming. 🤪
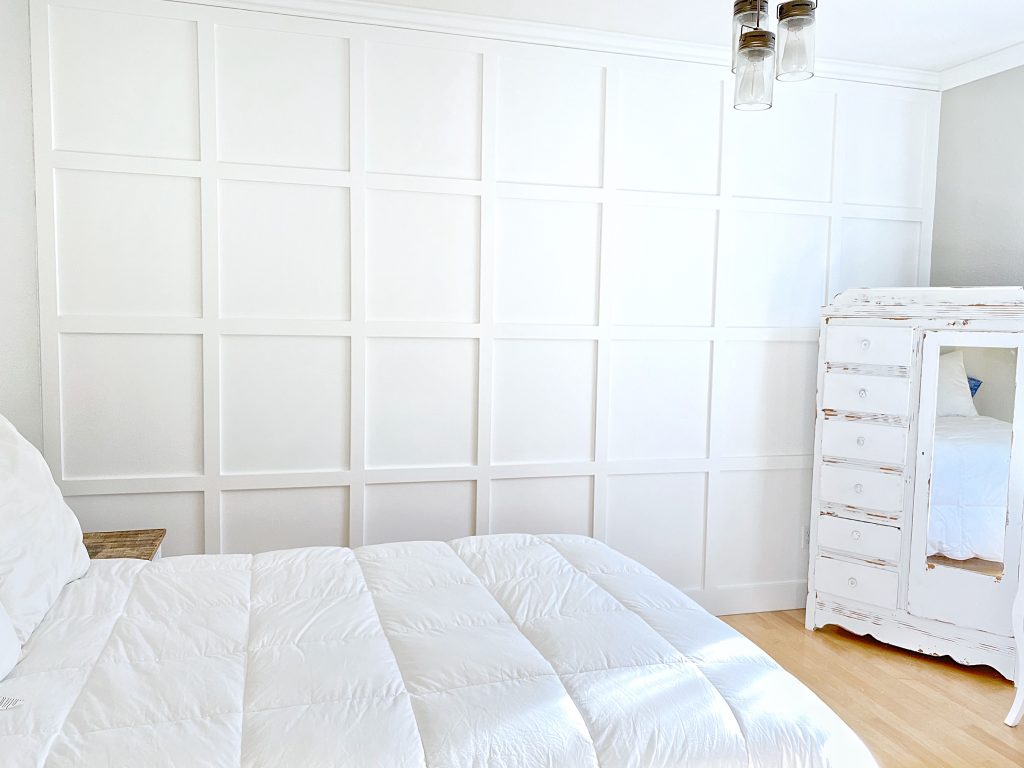
I did two coats of Sherwin Williams Pure White for the grid wall room and it took all day.
We used an old Frazee paint color in my other daughter’s room and the loft office space called White Shadow (Frazee is now owned by Sherwin Williams so they were able to easily match the formula).
I would have loved to switch both of those spaces to Pure White as well but every single trim piece and door and white cabinet in our house is White Shadow and there is no way I am up for the task of painting all of those items right now to change to Pure White… maybe someday but certainly not now!
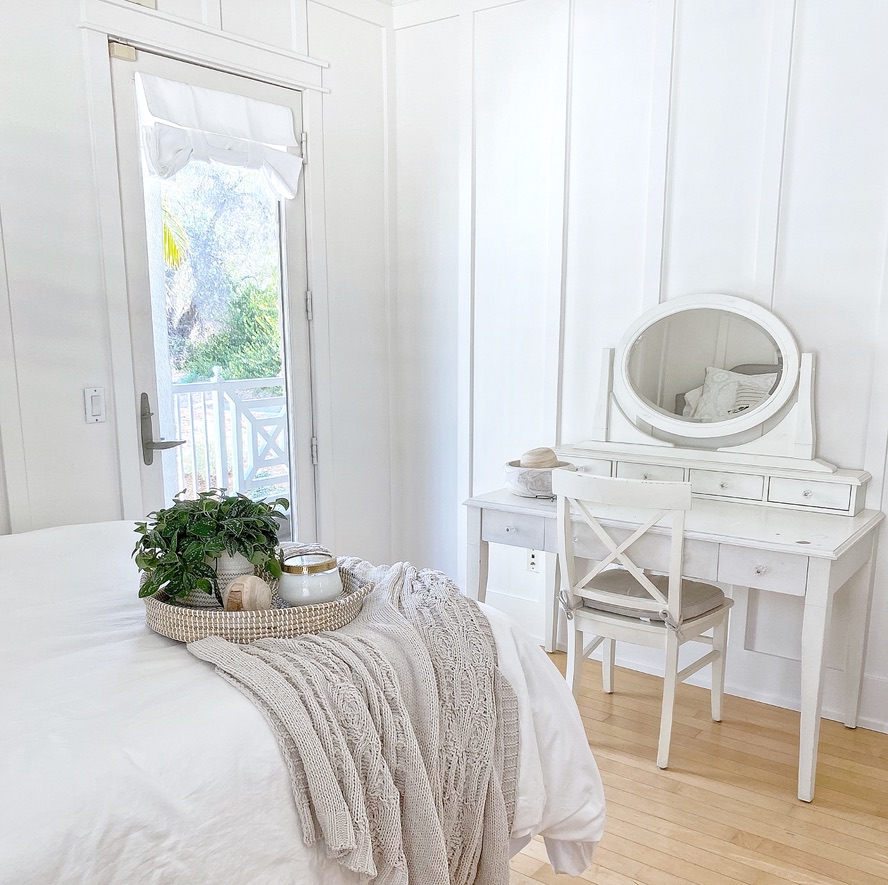
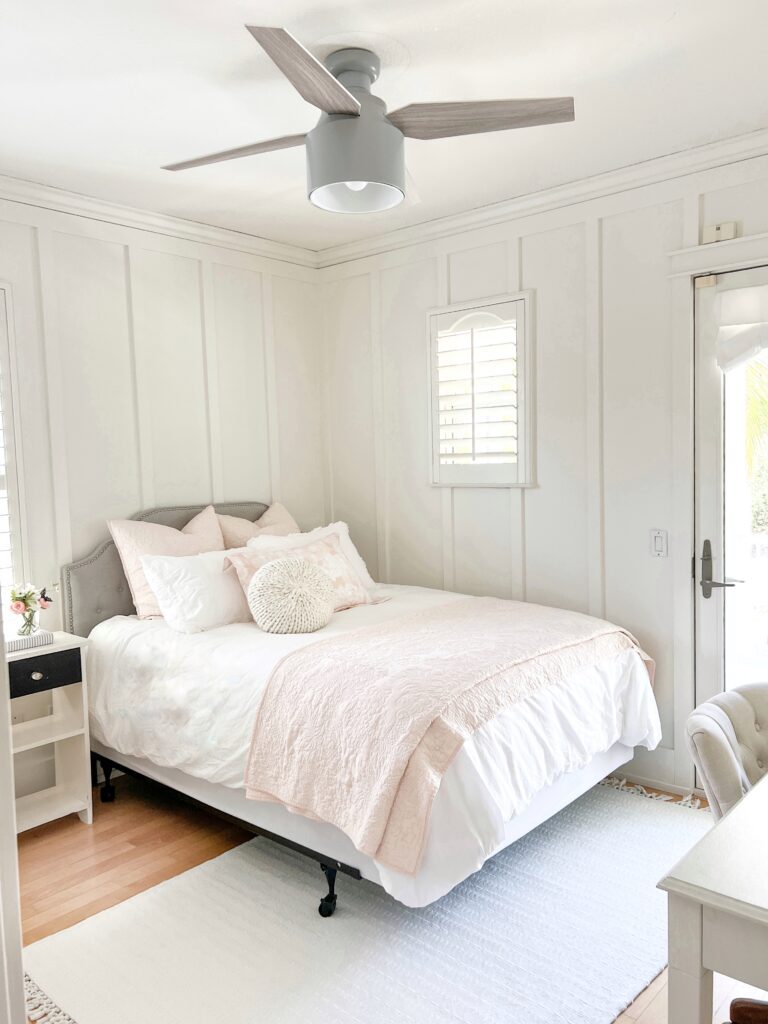
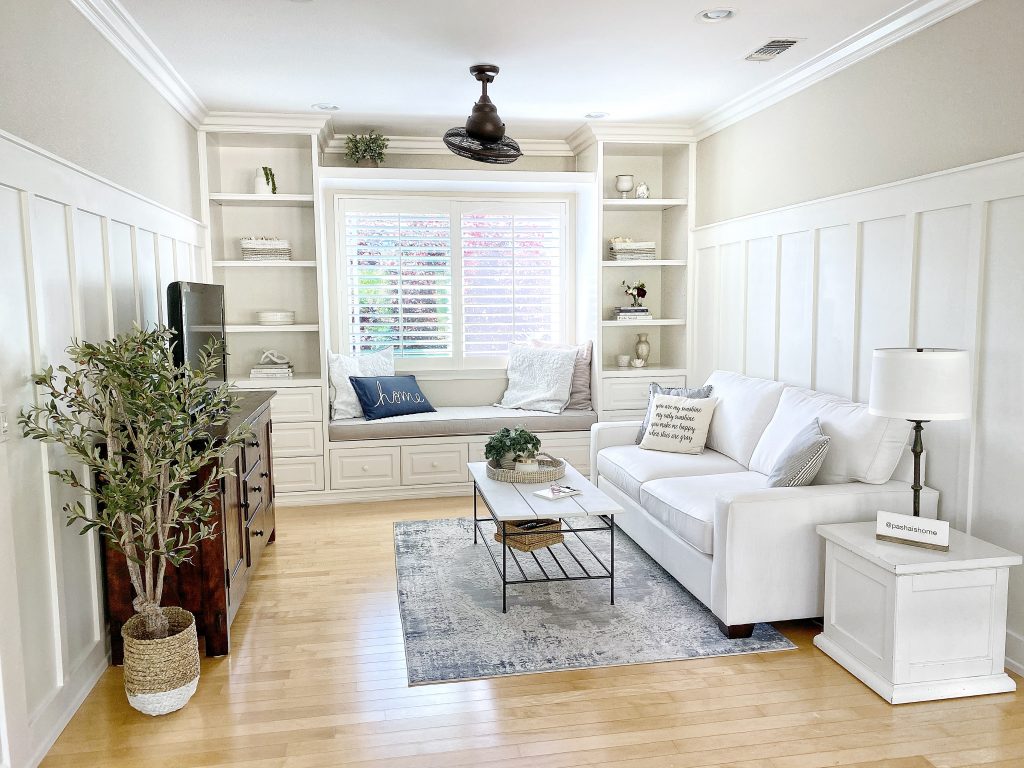
This is the finished grid wall:
After we finished this grid wall, we moved to our oldest daughter’s room and lastly our upstairs loft space…
We pretty much followed the exact same steps as above but obviously measuring and placing the battens was different as we did a different type of pattern in those spaces!
But other than the measuring and spacing- our steps are exactly the same.
If I can tell you one thing about these projects- it is buy that laser level!!!
Well- and the cordless nail gun…
Before photo of my oldest daughter’s room:

In this room we did floor to ceiling vertical board and batten. I also did not prime the mdf boards before the battens went up and boy did that make more work for myself fyi!!!
The finished room:
We left the old crown molding up in both rooms because we just were not sure how much work it would have added to have taken that molding down.
We did not add the molding ourselves so we had no idea if they were glued up, nailed up, etc and possibly having to repair the ceiling was not in our timeline or interest!
I honestly do not even notice it when I look at our handiwork!!
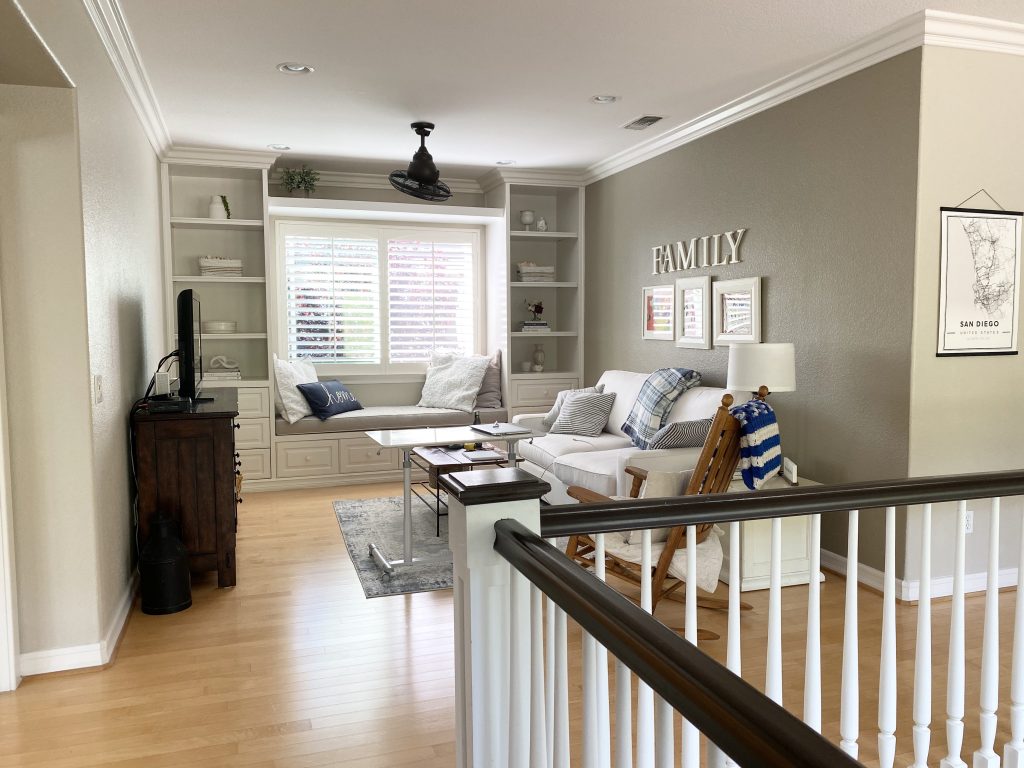
The last space we worked on the great summer of 2020 was our upstairs loft space 🤪.
We did the two walls at 78 inches tall for the boards with 5 inch wide top, bottom, and side pieces with a one inch piece on top.
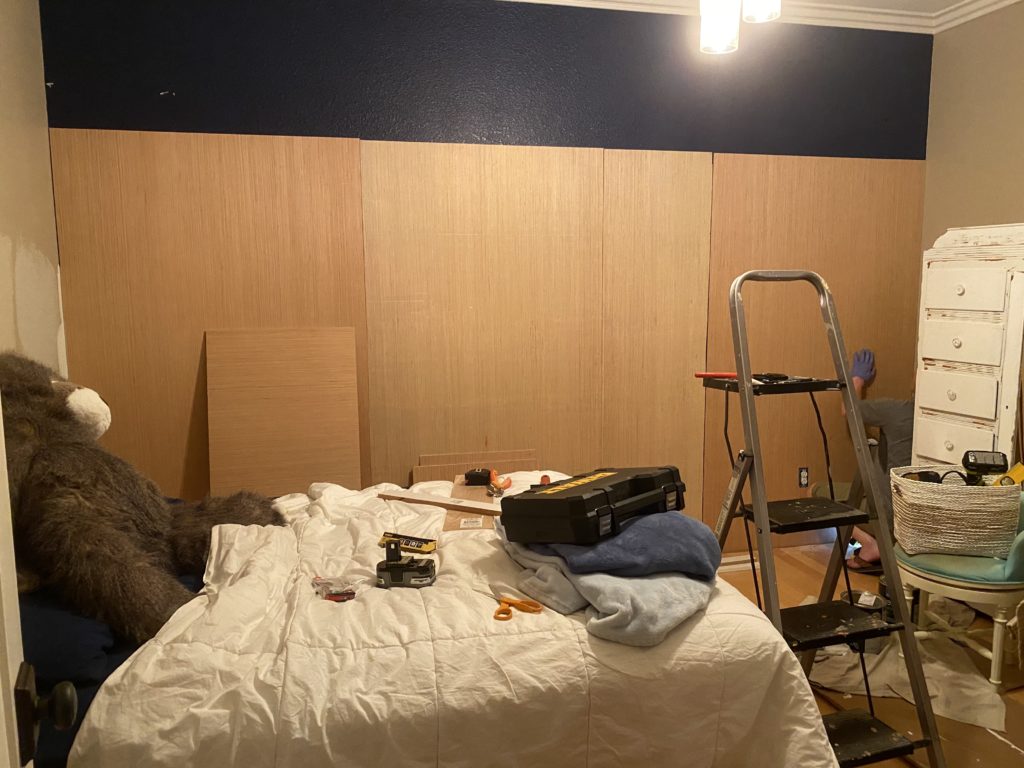
This is the before photo:
And a during the process photo:
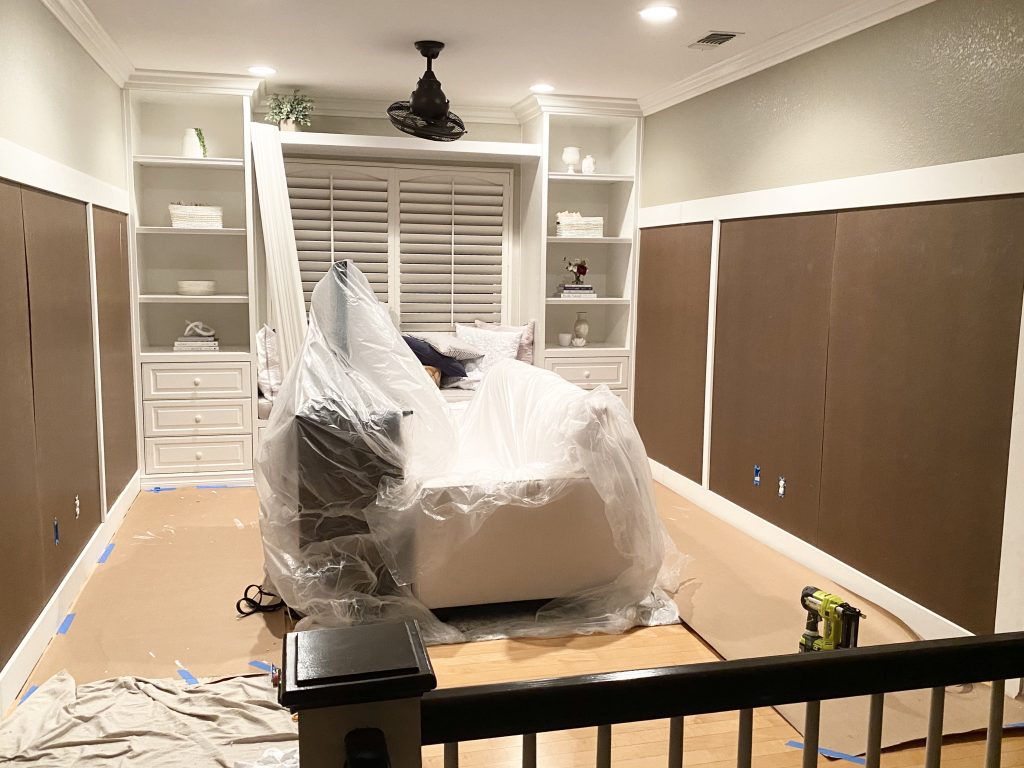
This is the end result of our last B&B project in the loft space. It took us three days start to finish and I am just in love with the difference it makes in this room!
And there you have it- our biggest DIY projects of the year… and all because we canceled a 50th birthday trip to Greece…
Summer of 2021 I am planning on doing that grid wall in my primary bedroom and I cannot wait to use all my favorite tools again! Be sure to follow along on Instagram for that fun project!
I hope this post is helpful to you in your board and batten projects! It really adds so much character to any space!!
Looking for an item that wasn’t linked in this post?
Be sure to check out my ‘Home Tour’ pages or ‘my Curated Collections Shopping Pages’ here.
Did you find this post useful? Pin it to your boards – just click the Pin button in the upper left corner!
Are you looking for more accent wall ideas? I’ve got you covered here!
Home is where one starts from.
~ T.S. Eliot
Don’t miss any of my tips, inspiration, or stories! Follow me on Instagram, Facebook, and Pinterest!
As always, I love hearing from you!!
I make every effort to reply to every comment below. But if for some reason I missed it – please feel free to contact me here.
Have a wonderful day my friend! I hope something makes you smile today ;).


[…] you see my blog post showing you how we did a grid wall in my youngest daughter’s bedroom and wall to wal… over the summer? It was how we ended up celebrating my 50th birthday 🤷♀️. But that fact […]
[…] recently bought quite a few items from the Ryobi One+ tools line (did you see my tutorial on how to do a board and batten wall? That’s why we bought the tools…). My husband is actually more partial to the DeWalt […]
[…] (it’s in my youngest’s bedroom in case you were wondering). Did you see how we did a grid accent wall in that room? Don’t you think a wreath would look great above her […]
[…] This small desk is what was brought downstairs to the walkway between our family room and dining room (if you guessed this is where the bar cart was located – you are correct!). I recently chalk painted this desk Rustoleum Linen White. For those of you that have been following me for a while here or on Instagram– you know that my coping mechanism for the pandemic and all things 2020 has been painting EVERYTHING white!! See my previous posts on my master bathroom remodel or the DIY board and batten in three spaces in my house! […]
[…] We learned how to DIY Board and Batten!! […]
[…] loft. One we had done about two years ago and the other two we just added this last summer. See my blog post with how we learned how to add board and batten to these […]