

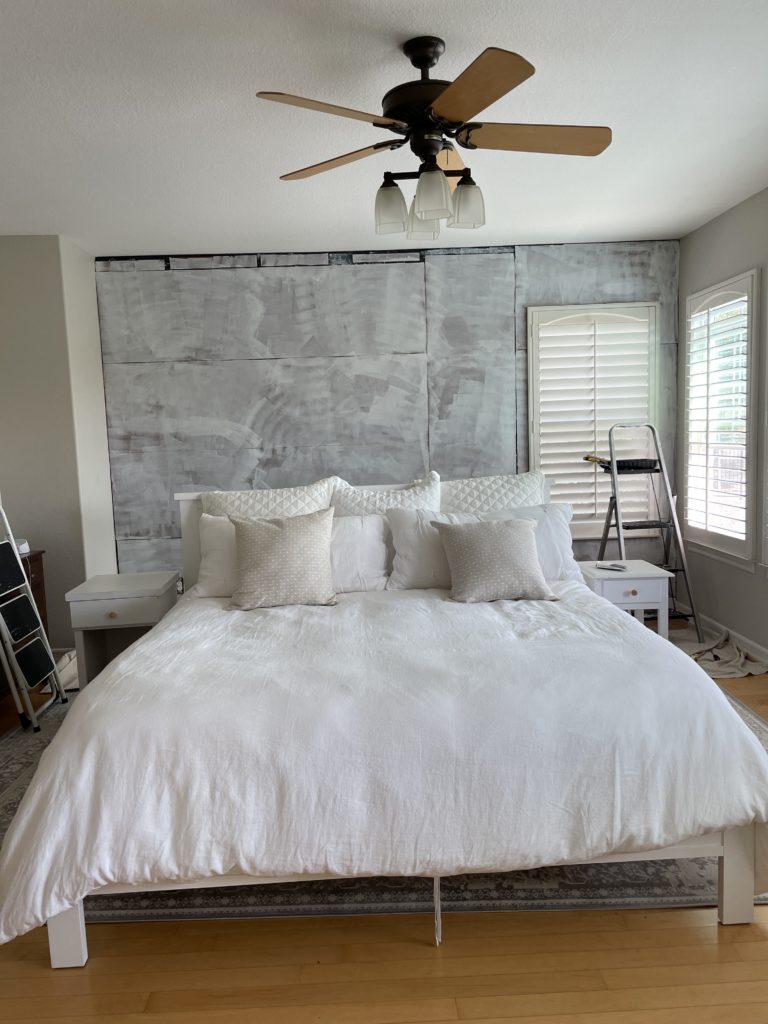
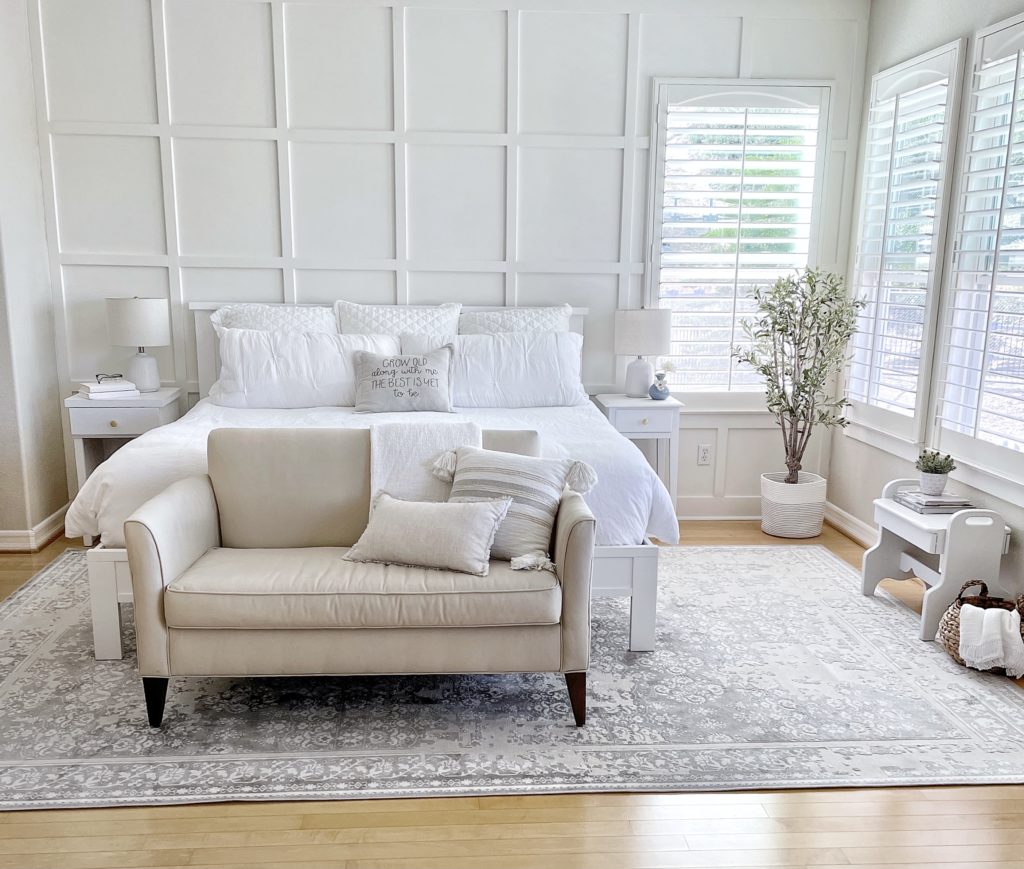
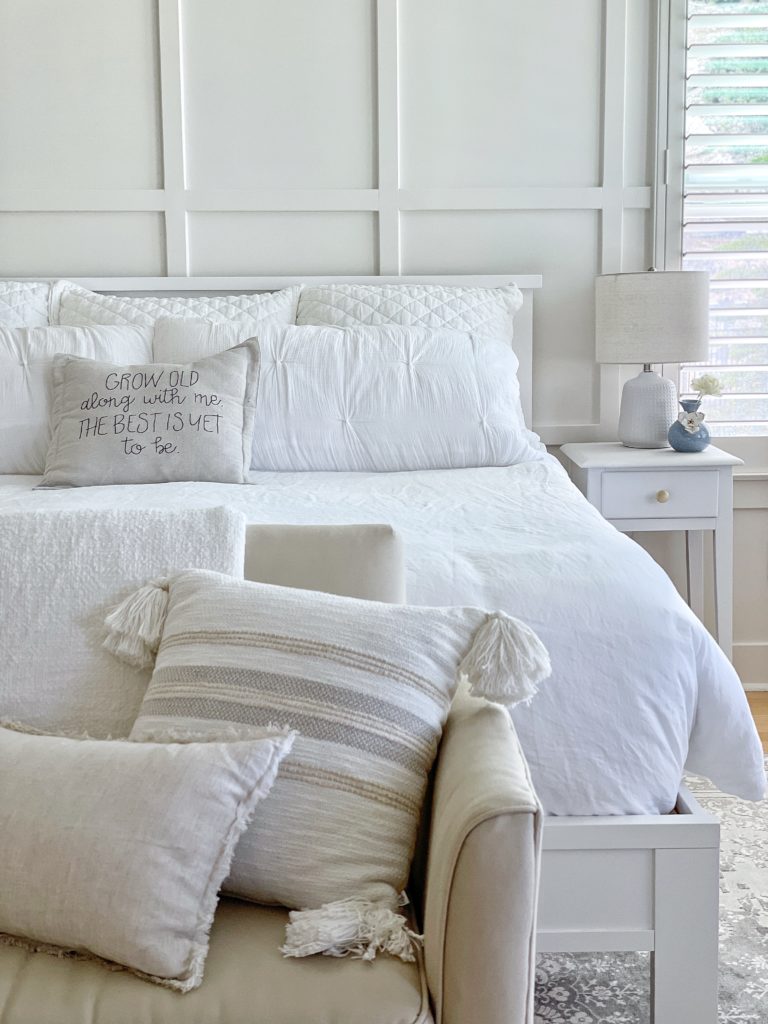
My husband and I celebrated my birthday this year by learning how to do a grid accent wall and I love how much it prettied up my bedroom!
For my 50th birthday in June 2020 (you know – during the pandemic that took travel and parties out of most of our lives) – I decided I wanted to learn how to put up board and batten.
And so I did (with my husband as my teammate of course!).
We started with a grid wall in my youngest daughter’s room.
And while I wrote a blog post about how to board and batten (that you can read here) -with this second grid accent wall project, I realized that a grid wall is actually quite a bit different than just simple board and batten and definitely deserves its own set of instructions :).
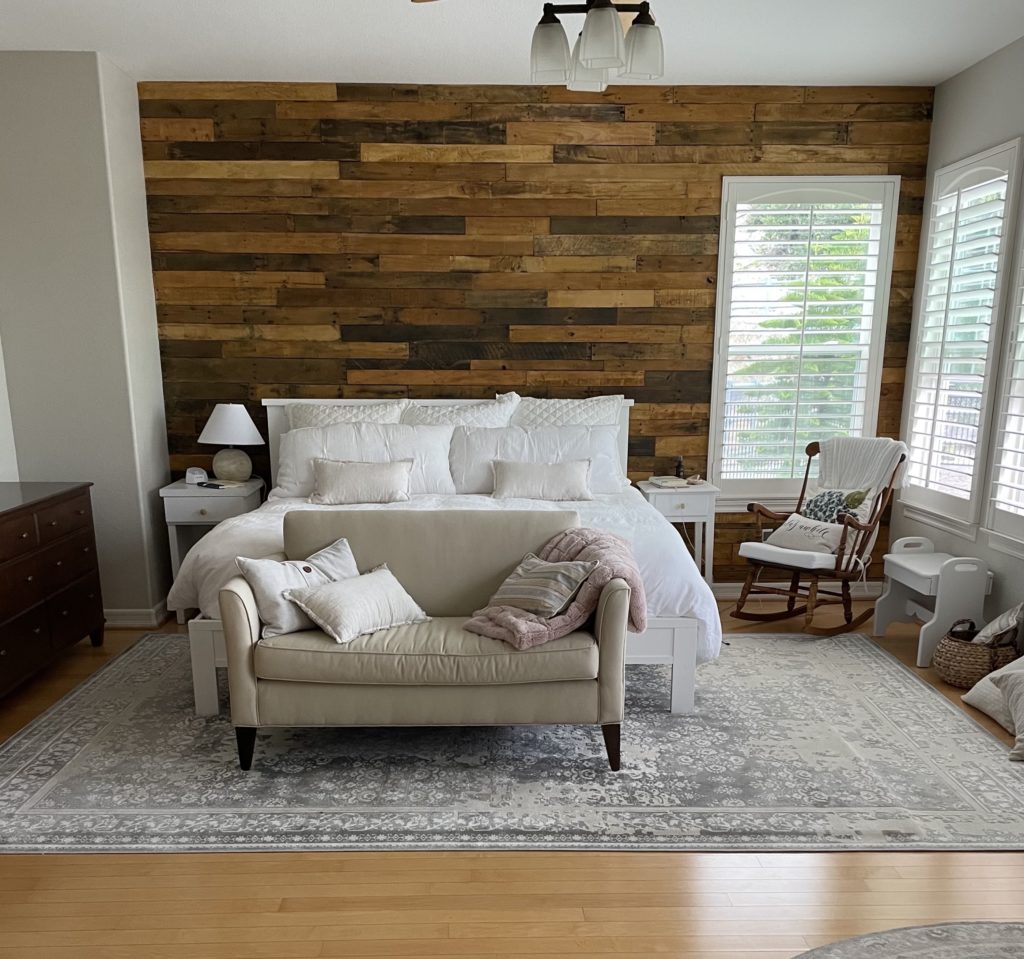
We have had pallet wood as an accent wall behind our bed for the last six years but 2020/2021 have been the years of lightening and brightening (EVERYTHING) for me.
Once I saw how gorgeous the grid wall in my daughter’s room turned out last summer, I knew it was only a matter of time before we did it in my bedroom.
This is the pallet wall we had for over six years in our room (now mind you I DID LOVE IT – but again I just needed to cheer things up in my bedroom 😉):
So that was how we spent my birthday week this year again (2021!).
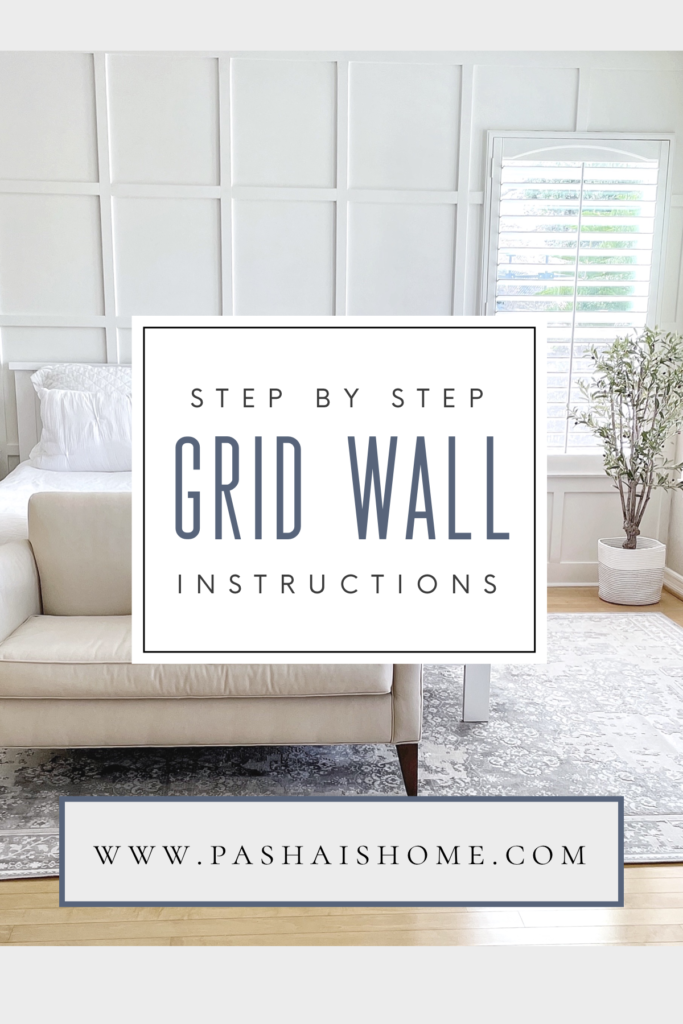
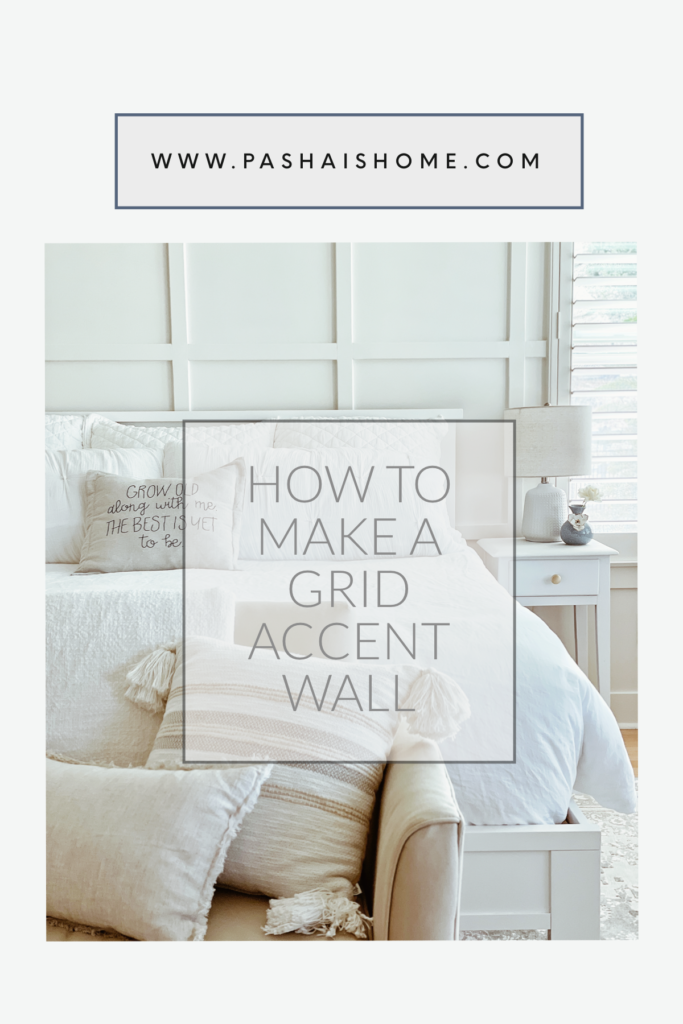
I decided to write this post showing you how to do a grid accent wall in hopes you will feel encouraged to do a wall in your own home too!!
Trust me – if I CAN DO IT – YOU CAN TOO!!
I also painted every single inch of my main bathroom in the summer of 2020 right down to stenciling the bathroom floor. You can read the post about the bathroom here and how to stencil a tile floor here :).
For those of you not in the know about me – I am a self professed board and batten-aholic. If I could have it on every wall in the house, I would. Oh wait- I think I almost do now 😂.
It adds such character and charm to every room and honestly is really not as hard as you might think (if you are even thinking that!).
In a rush?


Ready to Get Started??? Let’s Go!!
- What You Need for your Grid Accent Wall
- Steps:
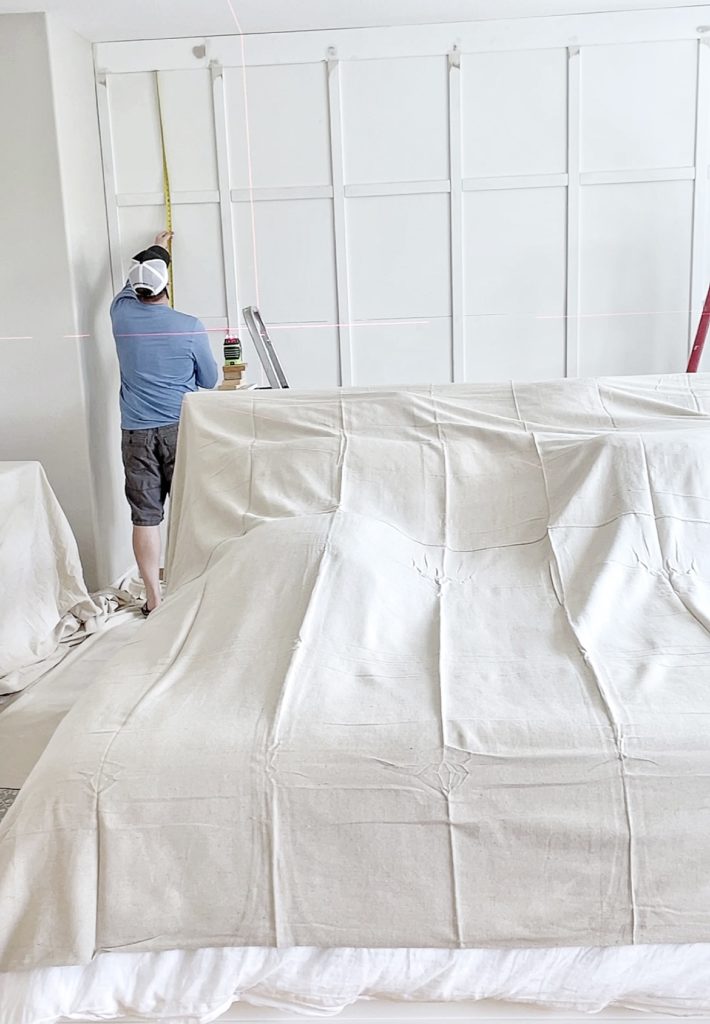
- 1) Plan and Measure and Then Measure Again
- 2) Put Up the Hardboard Backer Boards
- 3) Prime the Boards
- 4) Paint the Boards
- 5) Put Up the Battens
- 6) Use Hole Filler to Cover all the Nail Holes
- 7) Sand the Battens Intersections
- 8) Use Wood Filler to Fill in Any Gaps in the Batten Intersections
- 9) Sand the Batten Intersections (AGAIN!)
- 10) Caulk Every Seam
- 11) Paint the Entire Wall
- 12) Stand Back and Appreciate Your Hard Work!
What You Need for your Grid Accent Wall
- Brown Wall Panels (we got ours at Lowe’s but you can get this at any home improvement store
- Primed MDF Battens – our top and bottom horizontals are 1in x 5.5in x 12ft and the rest of the battens are 1in x 2.5in x 8ft
- Measuring tape
- Trim Puller
- Jigsaw to cut the panels
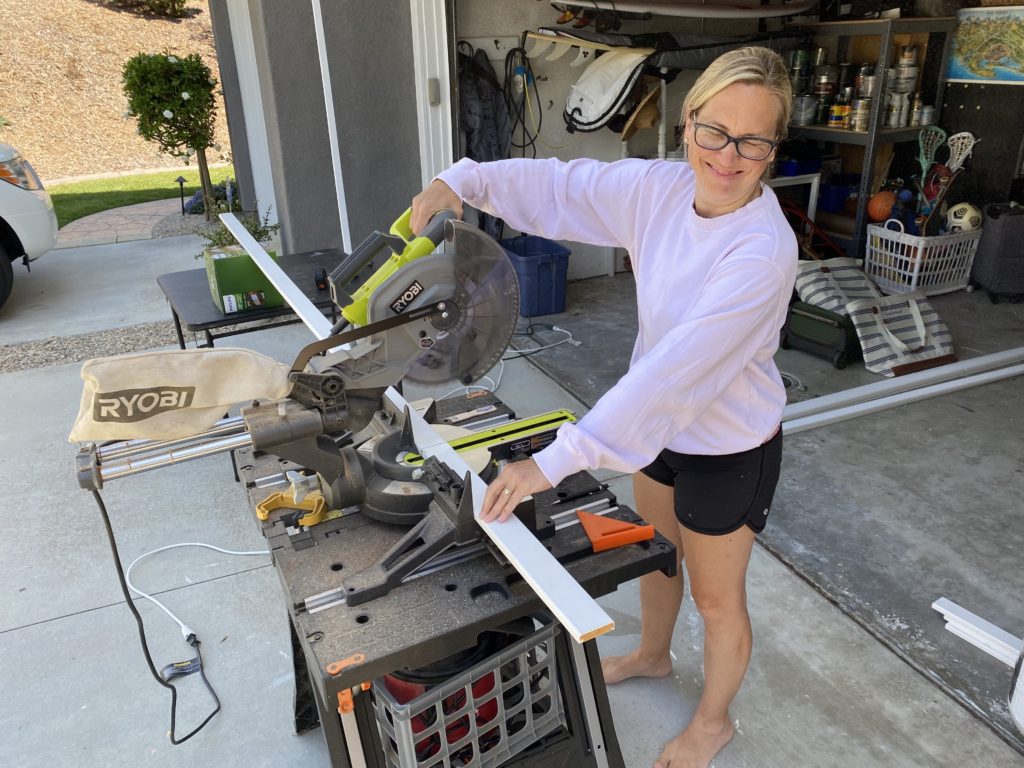
- Miter saw to cut the battens
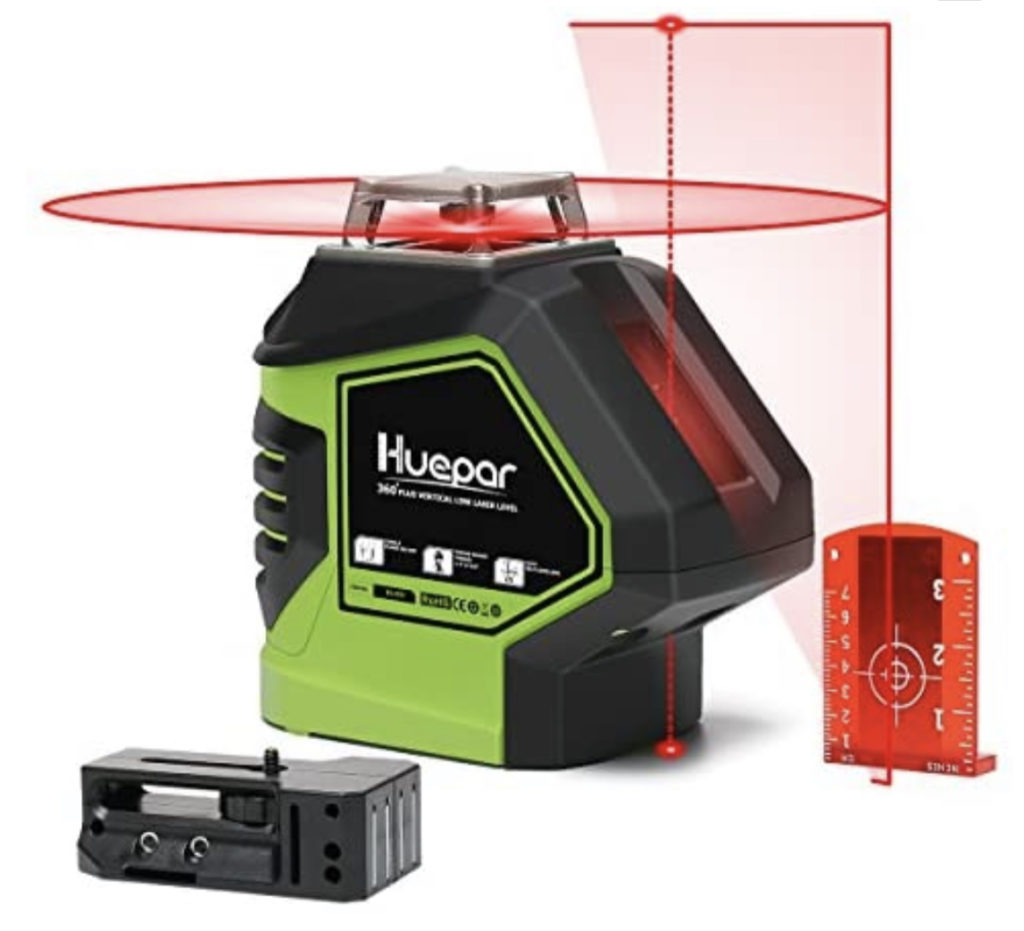
- Laser Level
- Nail Gun with nails
- Multi Tool
- Finishing sander
- Sander Pads
- Liquid Nails
- Wood Filler
- Small Hole Repair
- Caulking gun
- Caulk
- Wet/Dry Vacuum
- Primer
- Paint
- Paint Rollers
- Paint Roller Covers – 1/4 nap or foam rollers work best on this smooth surface
- Paint Brushes – I used my 1 1/2 inch Purdy Clearcut brush the most
- Paint Trays
- Rags
Steps:
1) Plan and Measure and Then Measure Again
This step right here is one that A LOT of people gloss over. Or figure they can start working on the project and it will all work out.
If you are a semi-perfectionist or don’t want to be embarrassed by your seams being visible and your squares being uneven, do yourself a favor and spend some prep time on this step!!
My husband suggests using chalk on your driveway to outline the size and shape of your wall (especially if windows are involved). And then laying your boards out on this outline so that you can see exactly where your seams will line up with your battens.
It is pretty important that you have a batten covering every seam on your boards. Otherwise – you are really making a BIG job for yourself with sanding, using wood filler, and/or caulk to hide those seams and you still are going to probably end up with an amatuer looking result by doing this 😬.
The second crucial part of this step is MEASURING OUT YOUR SQUARES!! Holy toledo – we must have done this step ten times!! And then ten times again as we started the project and were putting battens on the wall!
And if any of you have read my organizing or budget blog posts – THIS IS WHERE MY BELOVED GRID PAPER comes in handy (again)!!
We measured the height and length of our wall and knew that we wanted 7 rows across and 4 rows down. Then we subtracted out the width measurements of all the battens for each row and divided by the total number of rows to figure out the size of our squares.
Our squares ended up being really close to 22 square inches each.
Even with all this prep though – we still ended up taking a couple of battens off when we could tell our measuring for the squares was not equal. If your wall is anything like our builder grade wall – they are seriously NOT STRAIGHT or EQUAL in size on the top of the wall and the bottom. Go figure…
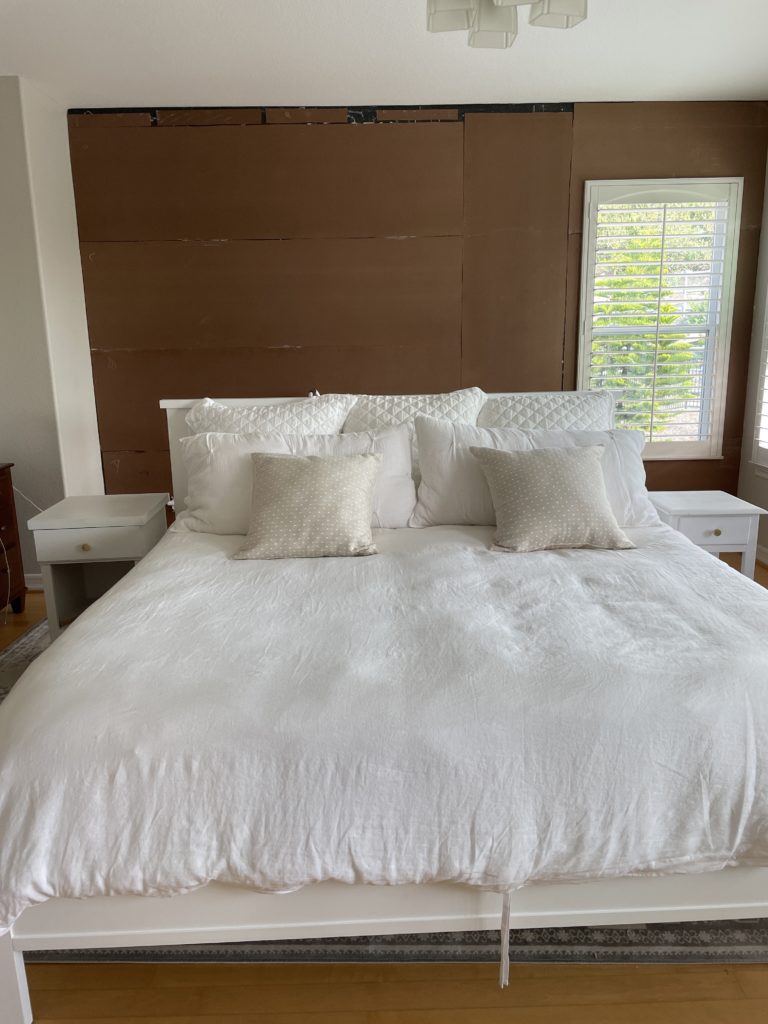
2) Put Up the Hardboard Backer Boards
Using liquid nails and your nail gun – you are ready to put those boards on the wall and start the manual labor part of the project!
I would tell you the brainy, paper part is over but if you read step one – you know that we got stumped a few times with the measurements of our squares with the shape of our wall so using the brain went til the end… 😂
3) Prime the Boards
Priming and painting the boards BEFORE you start putting up the battens will seriously save you SO.MUCH.TIME. You will still be doing two more coats of paint at the very end of the project but this will save you time with all the nooks and crannies being covered because once those squares are up – man oh man are there more corners to work around!!
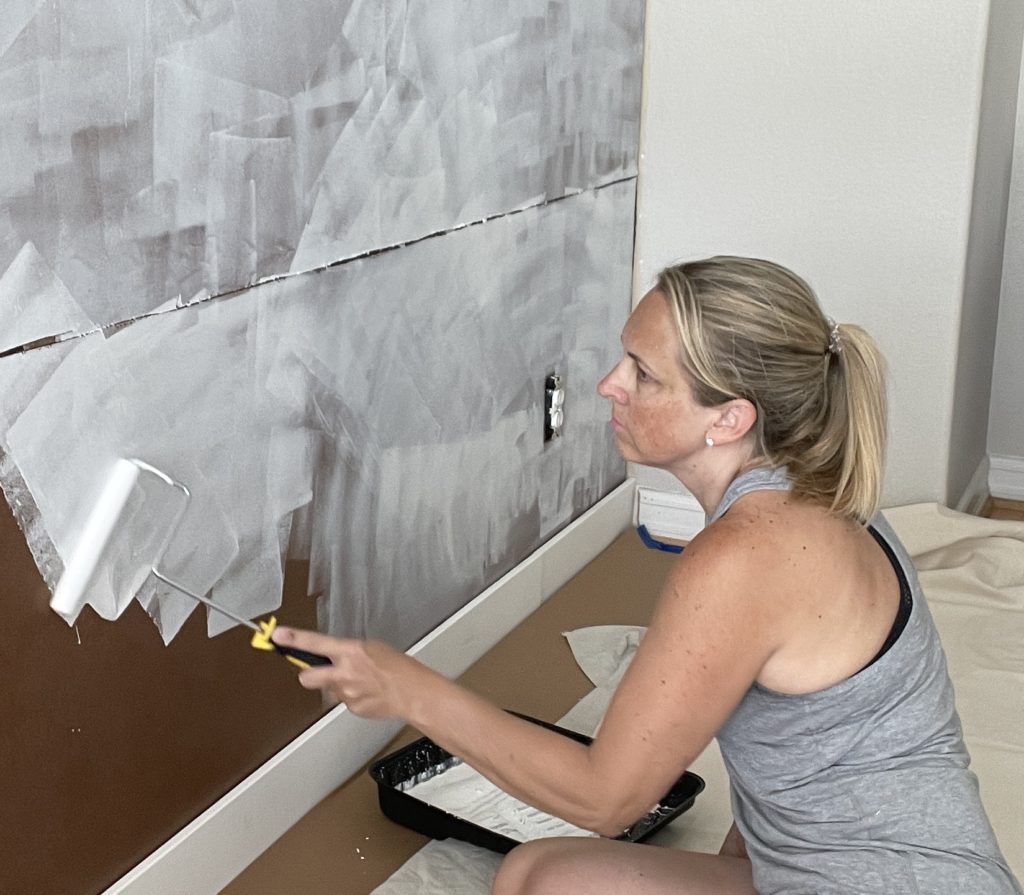
4) Paint the Boards
See above if you are still confused on why you would paint this early in the project…
My grid accent wall paint color is an old Frazee color called White Shadow that I can still get at Sherwin Williams (they bought Frazee a while back :)). My wall color is Sherwin Williams Accessible Beige.
You can learn all my house paint colors and details if you check out my Home Tour pages here!!
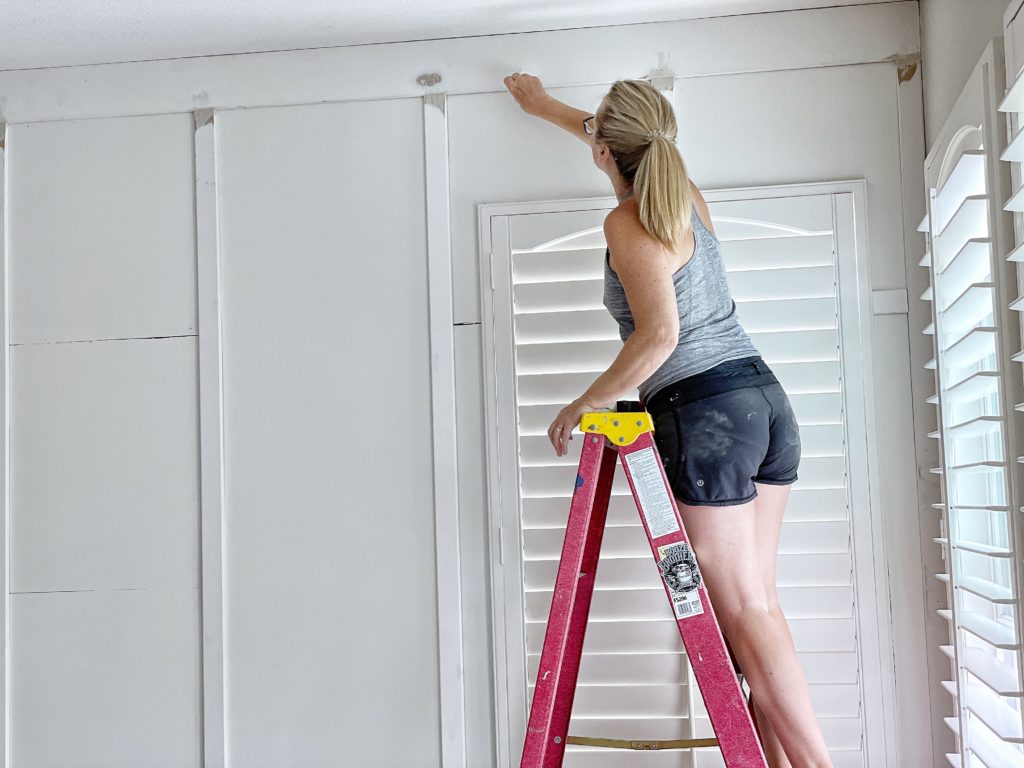
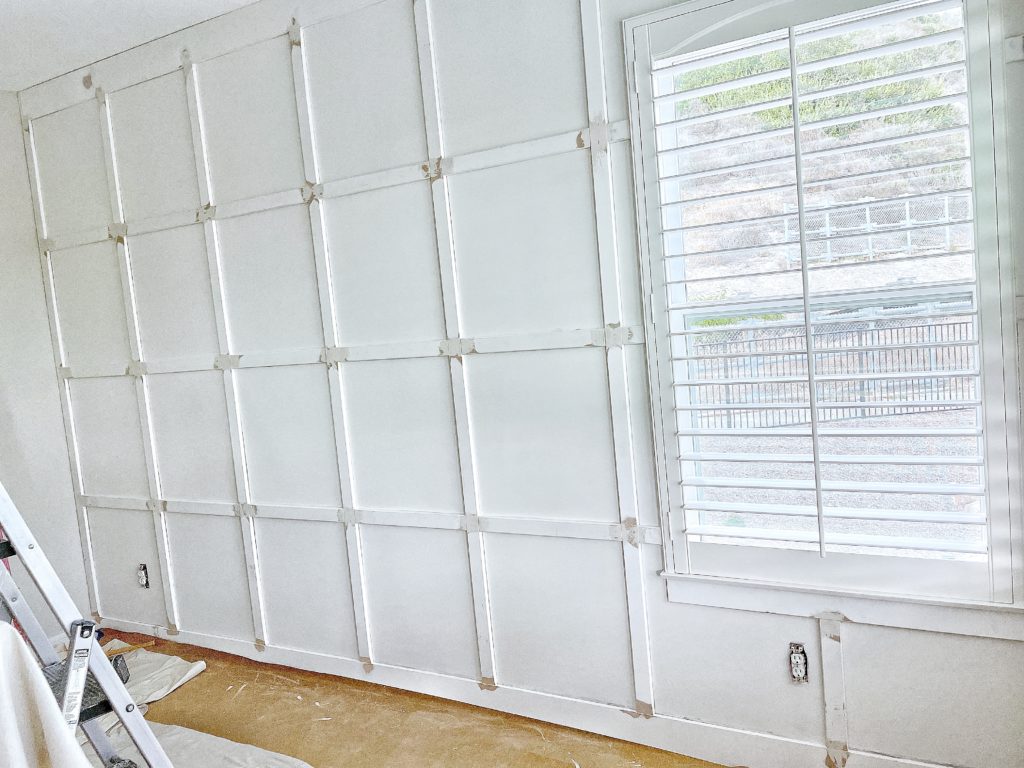
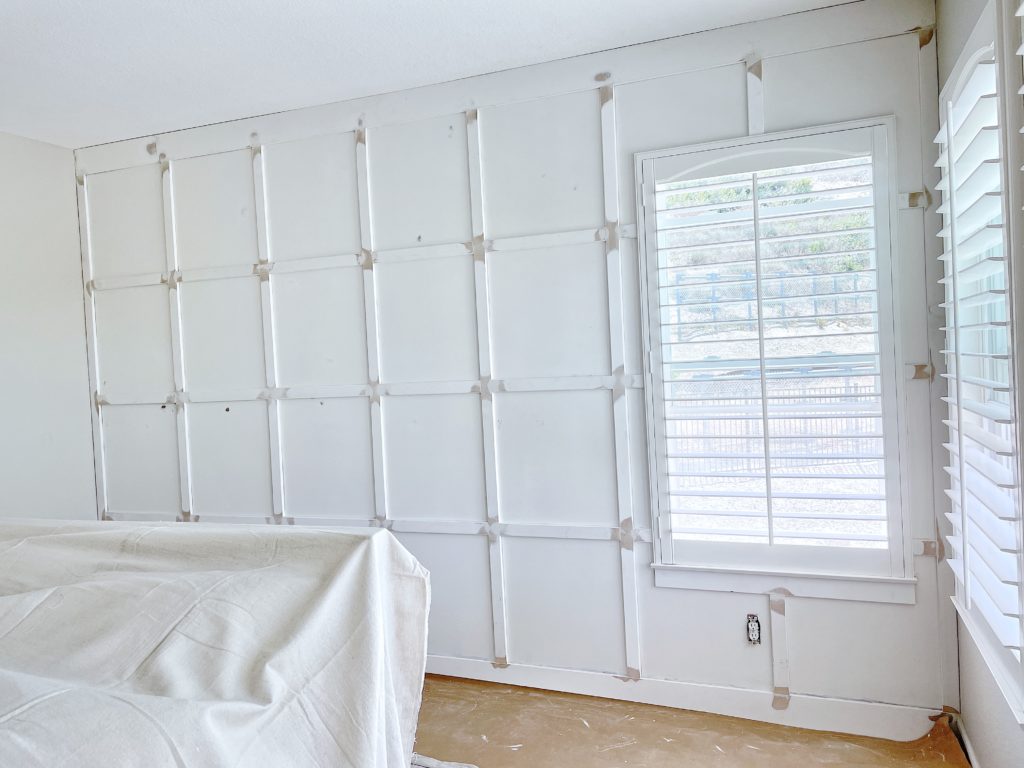
5) Put Up the Battens
Take your time on this step. Like seriously.
You will be putting up the vertical battens first. We even lay all of our verticals against the wall before permanently putting them up so that we can take a step back and make sure they are all perfectly aligned.
This is where the laser level is the BEST TOOL FOR THIS PROJECT! So do yourself a favor – and buy this tool!!
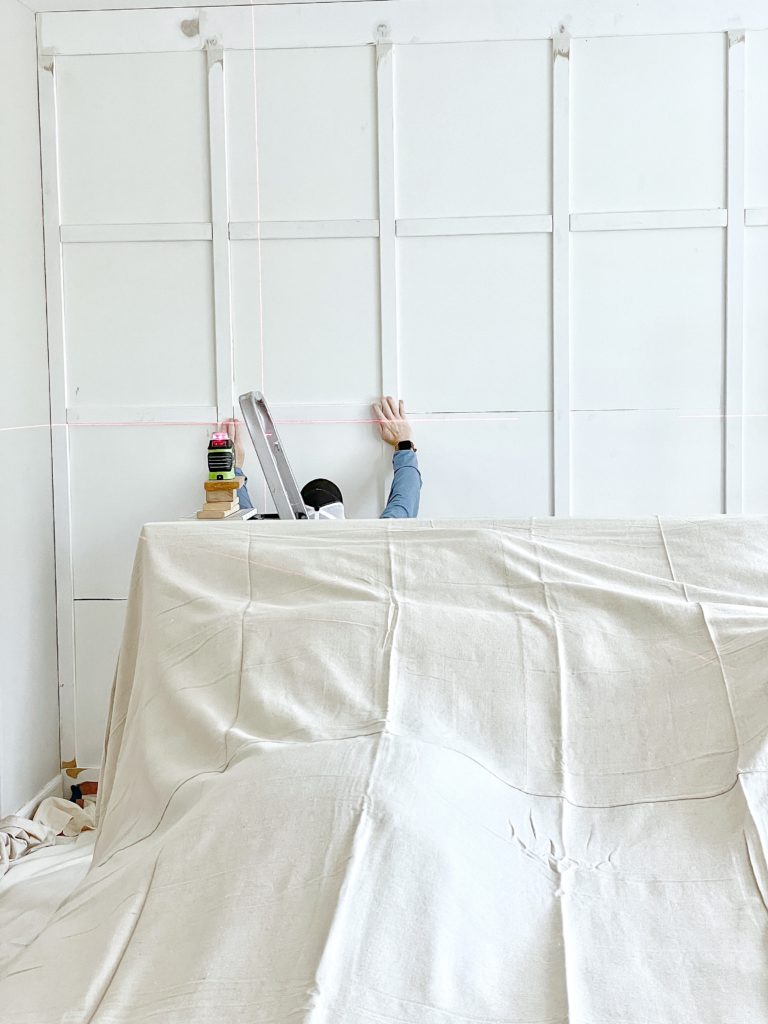
Once all of your verticals are on the wall, start on the horizontals. This is where going up and down the stairs for all these cuts really helped us get a daily workout for the week we took to do this project 😂.
6) Use Hole Filler to Cover all the Nail Holes
A good friend of mine on Instagram introduced me to this product and now I do not ever want to do a millwork project without this easy hole filler again!
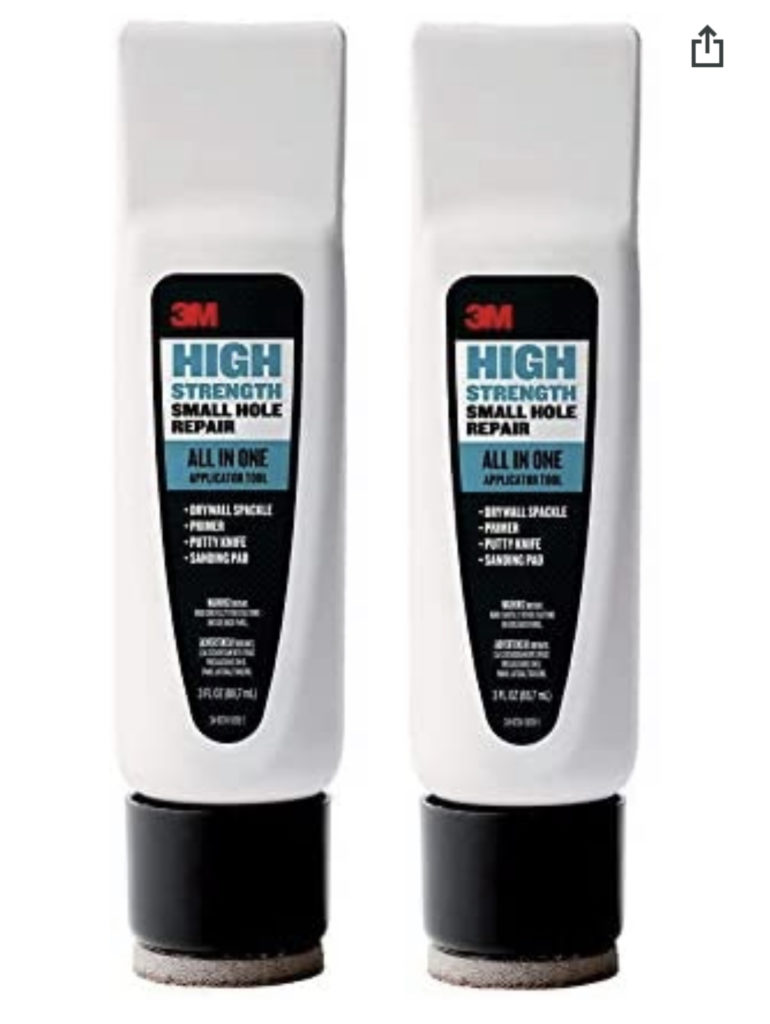
Do yourself another favor… buy this filler – don’t worry – it’s ridiculously cheap too!
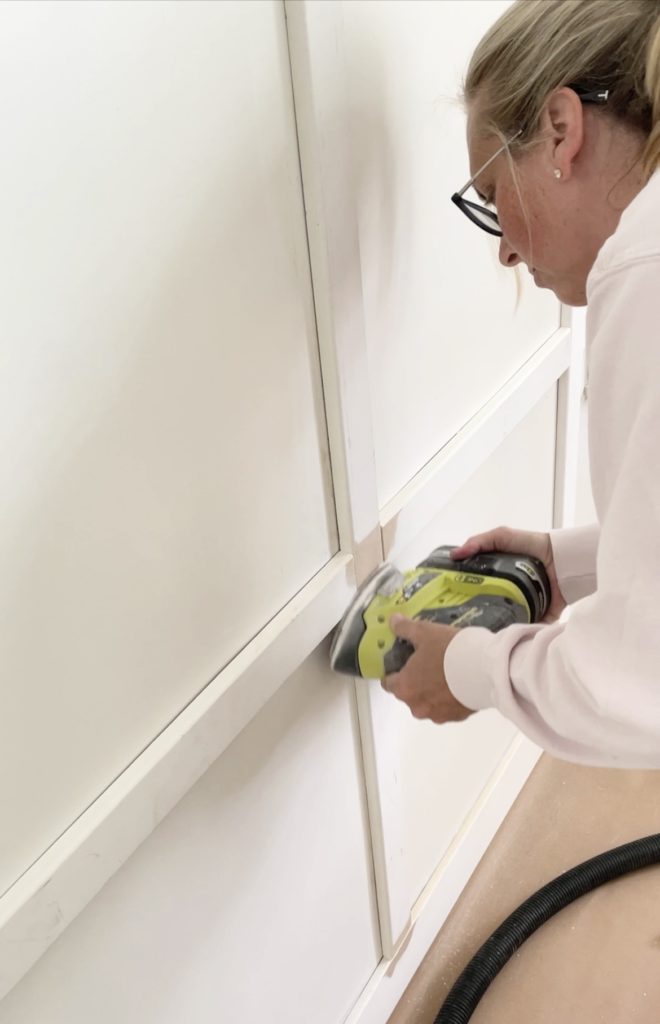
7) Sand the Battens Intersections
This is a step that I have noticed a lot of people leave out. But I am so detail oriented in my millwork projects that when I run my hand over the places that the battens meet – I do not want to feel a single bump. I want it to feel as smooth as butter.
My ultimate goal is to get those intersections so that you can’t even tell where one batten starts and the next one ends. But I am only lucky occasionally with getting that result. Spend long enough with steps 7, 8, and 9 and you can achieve this though!!
I was getting a tad weary of how long this project was taking us so I chose to see the lines on some of my meet up spots…🤷♀️
8) Use Wood Filler to Fill in Any Gaps in the Batten Intersections
This is where perfectionist Pasha was looking for that butter smooth look. Let’s just say I got it in some of the intersections.
Also – wood filler is NOT the same as the product I suggested in step 6!
So go back and check out that amazing favorite product of mine :).

9) Sand the Batten Intersections (AGAIN!)
Since you used wood filler on the last step – you now have to get those intersections smooth again…
I really got a great arm workout with this project! Too bad I can’t keep sanding things around the house to keep my arms tone 🤪.
Do most of them look smooth as butter to you btw??? 🤪
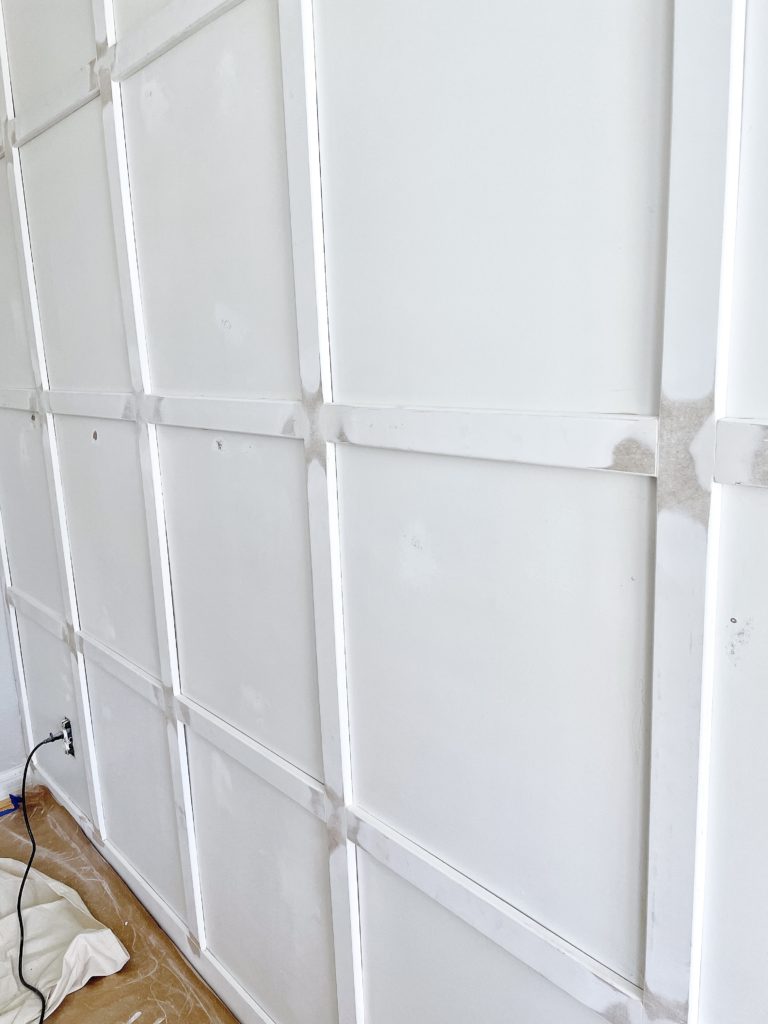
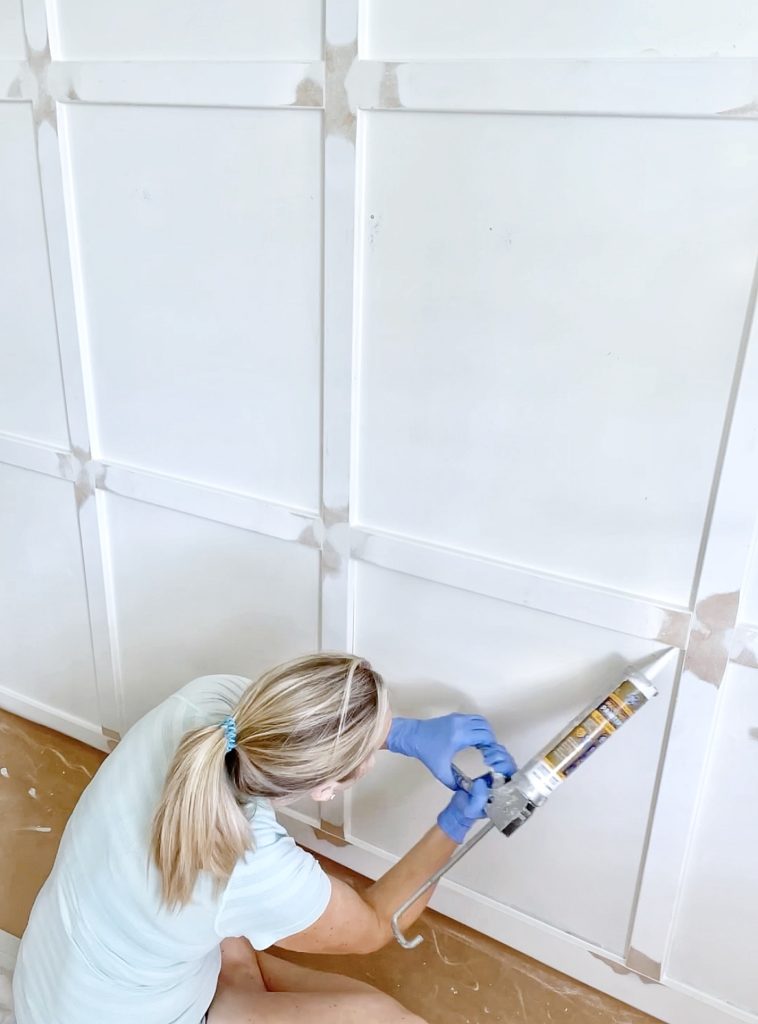
10) Caulk Every Seam
I feel like with this being my fourth millwork project in my house, I have gotten quite skilled with caulk. I wear gloves so my fingertips don’t get raw. And I have learned exactly how wide you want the caulk can opening as well as how much to put in the seams!! I would love to give you advice on this but truly – this is one of those practice makes perfect skills 😳.
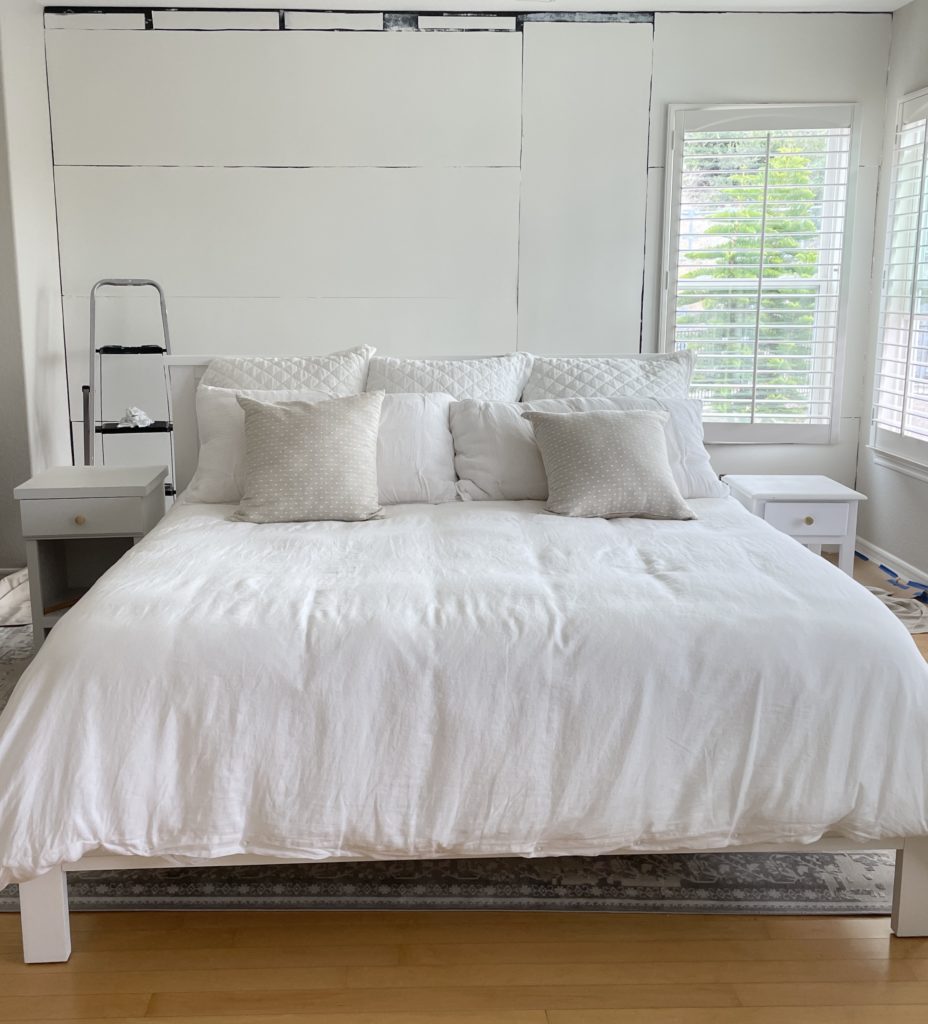
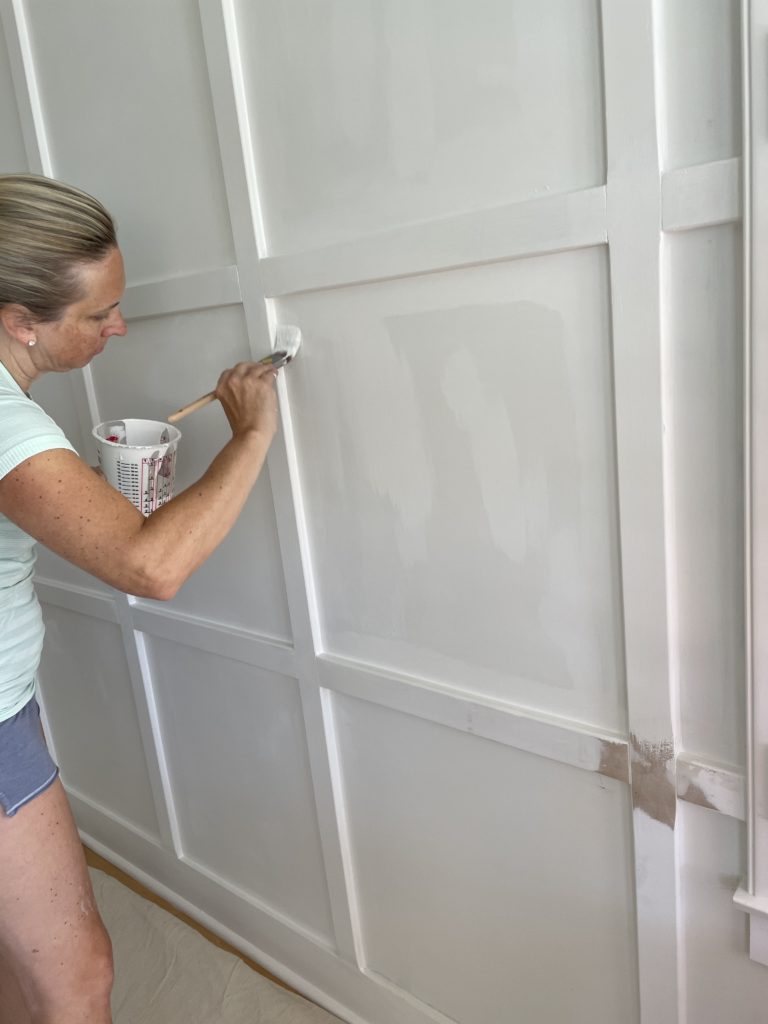
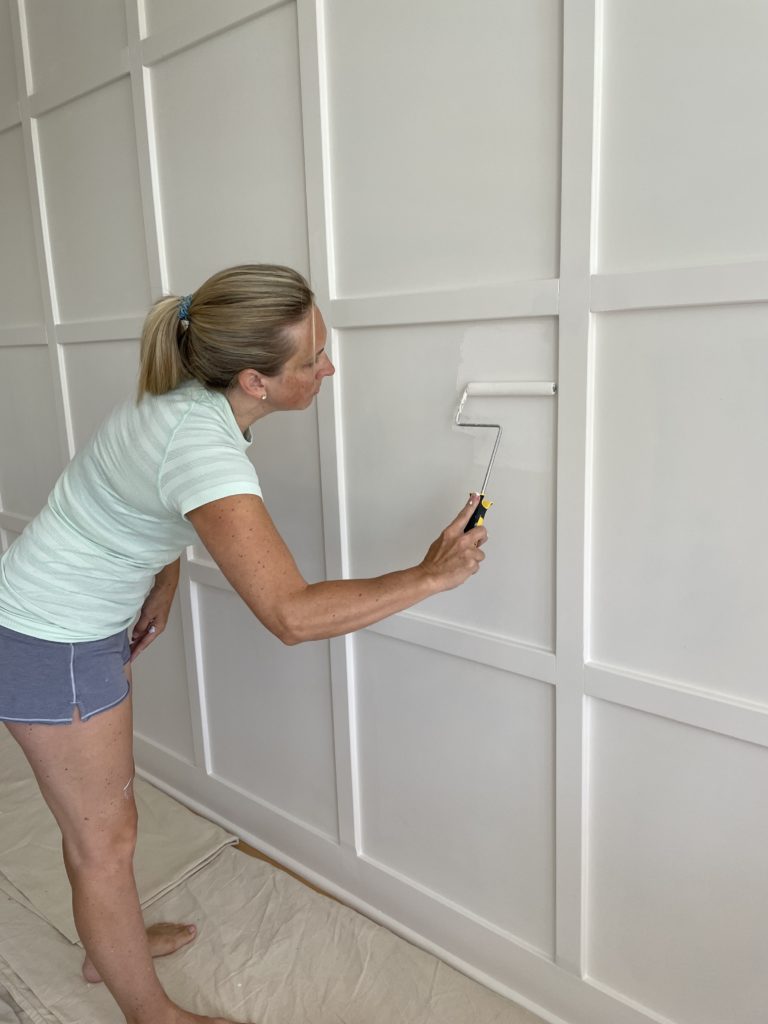
11) Paint the Entire Wall
Since you have already put two coats of paint on the back boards – all you are doing now is covering up your sanded areas and making the boards and the battens all the same color!
We purchased white MDF battens so they were already primed and using a roller on them goes pretty quick.
It’s those pesky corners that will take you longer but painting this finished wall took about three hours total – and then a quick second coat for perfection took minimal time.
12) Stand Back and Appreciate Your Hard Work!
YOO-HOO! Celebrate how gorgeous your room looks now!! I know I can’t stop looking at mine 😂.
Here are all the products I used on this project for your convenience:
Did you find this post useful? Pin it to your boards!
Please be sure to tell me if you do your own grid wall project!
It makes all the difference to me to know I have encouraged and/or inspired you to do any of my favorite projects, trips, or parties with friends – ALL THE THINGS!

Home is where one starts from.
~ T.S. Eliot
Don’t miss any of my tips, inspiration, or stories! Follow me on Instagram, Facebook, and Pinterest!
As always, I love hearing from you!!
I make every effort to reply to every comment below. But if for some reason I missed it – please feel free to contact me here.
Have a wonderful day my friend! I hope something makes you smile today ;).


[…] look at this DIY accent wall she made for […]
This is gorgeous! I would love to create a wall like this in my home.
If I can do it – anyone can ;)!!! Let me know if you do it!!
This made such a huge difference to the room!!! I love this transformation 🤍🤍
Thank you Crystal! It truly is like night and day! We are kinda shocked tbh at what an improvement it is 😉